


The first time I opened my Ninja Air Fryer Toaster Oven after a week of cooking fries, chicken, and pizza, I was shocked at how quickly crumbs and grease had built up. That moment taught me that knowing How To Clean Ninja Air Fryer Toaster Oven isn’t just about looks—it’s about keeping food fresh, safe, and tasty. Over time, I’ve learned simple methods for both regular wipe-downs and even how to deep clean Ninja Air Fryer Toaster Oven when it needs extra care. In this guide, I’ll share my best tips, tested tricks, and personal lessons so you can keep yours spotless without stress. Stick with me, and by the end, you’ll feel confident tackling the mess and making your oven shine like new again.
Why Cleaning Your Ninja Air Fryer Toaster Oven Matters
Cleaning your Ninja Air Fryer Toaster Oven is not just about looks. Grease and crumbs burn each time you cook. This makes food taste odd and leaves strong smells. A quick wipe stops buildup and keeps meals fresh.
A clean oven also works better. Heat spreads evenly when the inside is clear. The fan moves air without struggle. This means food cooks faster and comes out crisp.
Regular care adds years to your oven’s life. Grease can harm the coating and heating parts. A few minutes of care saves you money in the long run.
I learned this after a surprise. One night my toast tasted like old chicken wings. That was my wake-up call. Once I cleaned it, food tasted bright again. Fresh and real.
What You’ll Need Before You Start
Before you clean your Ninja Air Fryer Toaster Oven, gather a few simple tools. This makes the job quick and stress-free.
You’ll need warm water and a little mild dish soap. A soft sponge or cloth works best since it won’t scratch the surface. For tough stains, keep some baking soda or vinegar nearby. A soft brush or even an old toothbrush helps reach corners.
And here’s the most important step—always unplug the oven before cleaning. It sounds simple, but it keeps you safe and prevents accidents
Step-by-Step Guide: How To Clean Ninja Air Fryer Toaster Oven
Cleaning feels easy when you break it into steps. Here’s how I do it, along with a few tips I learned the hard way.
Step 1 – Unplug and Cool Down
Always unplug the oven first. Let it cool before you touch anything inside. I once rushed, grabbed a tray too soon, and burned my hand. Lesson learned—patience keeps you safe.
Step 2 – Remove and Wash Accessories
Take out the crumb tray, racks, and baskets. Wash them in warm, soapy water. If grease is stuck, add a splash of vinegar. It cuts through grime fast without much scrubbing.
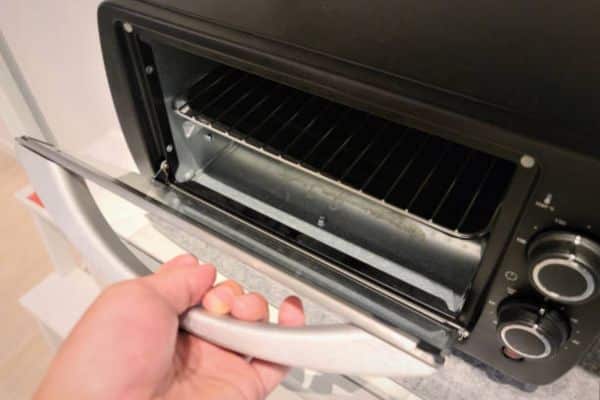
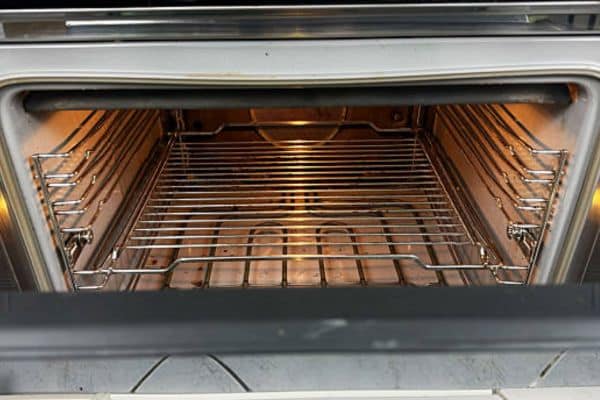
Step 3 – Wipe the Interior
Use a damp cloth with mild soap to wipe inside walls. Skip steel wool or anything harsh—it can scratch the surface. For stains that don’t budge, a little baking soda paste works like magic.
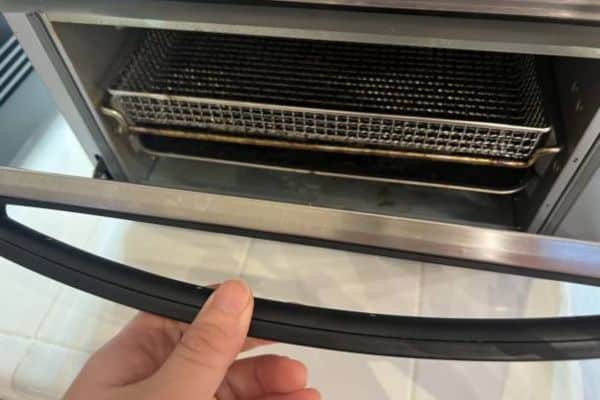
Step 4 – Clean the Glass Door
Mix equal parts vinegar and water in a spray bottle. Wipe the glass for a streak-free shine. My glass once looked cloudy, and it made food seem less appetizing. Cleaning it clear brought back the sparkle.
Step 5 – Clean the Exterior
Wipe the outside with a soft, damp cloth. Be careful near the buttons and plug—too much water can cause damage. A light wipe is all it takes to keep it looking new.
How To Deep Clean Ninja Air Fryer Toaster Oven
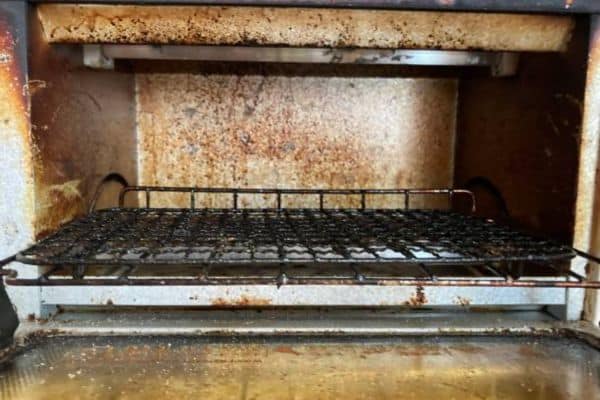
Sometimes a simple wipe isn’t enough. When grease builds up or the oven starts to smell, it’s time for a deep clean. Here’s how to know when and what to do.
When to Deep Clean
You’ll know it’s time if you see thick grease, smell burnt food even when nothing’s inside, or notice smoke while cooking. These are clear signs the oven needs more than a quick wipe. I like to deep clean my Ninja Air Fryer Toaster Oven once a month to stay ahead of buildup.
Step-by-Step Deep Cleaning Process
- Remove and soak trays – Take out all racks, trays, and baskets. Let them soak in warm, soapy water overnight. This loosens grease without hard scrubbing.
- Tackle stubborn spots – Make a paste with baking soda and water. Spread it on tough stains, wait a few minutes, then wipe clean.
- Scrub heating elements gently – Only when the oven is cool, use a soft brush to sweep away crumbs or grease near the heating parts. Never soak them.
- Air dry fully – Before you put everything back, let all parts dry completely. Moisture inside can cause damage or odors.
With a deep clean, the oven feels almost brand-new. Food tastes better, smells disappear, and cooking becomes more fun again.
My Personal Tips for Easier Cleaning
Over time, I’ve picked up a few tricks that make cleaning less of a chore and more of a habit. These little steps save time and keep the oven in great shape.
I like to line the crumb tray with foil. After a few uses, I just lift the foil and toss it away—no scrubbing needed. It’s a simple hack that keeps the mess under control.
Another habit that works wonders is a quick wipe-down after each use. It takes less than a minute, but it stops grease from hardening and crumbs from piling up. Small efforts now mean no big deep clean later.
One thing I learned the hard way is to avoid aerosol sprays. They can damage the oven’s non-stick coating. A soft cloth with mild soap is always safer.
And here’s my biggest mistake: I once used an abrasive pad to scrub a stubborn spot. It scratched the surface, and I regretted it right away. Gentle tools keep your oven looking new much longer.
Common Mistakes to Avoid
Even with the best intentions, it’s easy to make mistakes while cleaning. Here are a few to watch out for.
The first is submerging the whole oven in water. It might seem like a fast way to clean, but water can ruin the wiring and make the oven unsafe to use. Always clean the inside and outside with a damp cloth instead.
Another mistake is using harsh chemicals. Strong cleaners may strip away the non-stick coating or leave behind smells that transfer to your food. Mild soap, vinegar, or baking soda are safer and just as effective.
And don’t forget—always dry everything before plugging the oven back in. Even a little moisture near the cord or heating parts can cause damage or a shock. Let it air dry fully before you use it again.
FAQs
Can I put Ninja Air Fryer Toaster Oven parts in the dishwasher?
Yes, most trays, racks, and crumb trays are dishwasher safe. Check your model’s manual to be sure. I prefer handwashing with warm, soapy water—it keeps them in better shape.
What’s the safest way to clean heating elements?
Always wait until the oven is cool and unplugged. Then use a soft, dry brush or cloth to sweep away crumbs. Avoid water or soap on the elements to prevent damage.
How often should I deep clean my Ninja Air Fryer Toaster Oven?
A quick wipe after each use is best. For a deep clean, aim for once a month, or sooner if you notice smoke, strong odors, or heavy grease.
Can I use baking soda and vinegar together?
Yes, but use them wisely. Baking soda works well for scrubbing, and vinegar helps remove stains and odors. If you mix them, they fizz—great for loosening grime but rinse well after.
Conclusion
Keeping your Ninja Air Fryer Toaster Oven clean is easier than it looks, and it’s always worth the effort. A few minutes of care keeps food tasting fresh, removes odors, and makes cooking more enjoyable.
The key is simple: do a quick wipe-down after each use and give it a deep clean once a month. This small routine keeps your oven working like new and saves you from tough scrubbing later.
Ever since I started cleaning mine this way, cooking feels effortless again. Meals taste better, the oven looks brighter, and I never worry about smoke or burnt smells.