

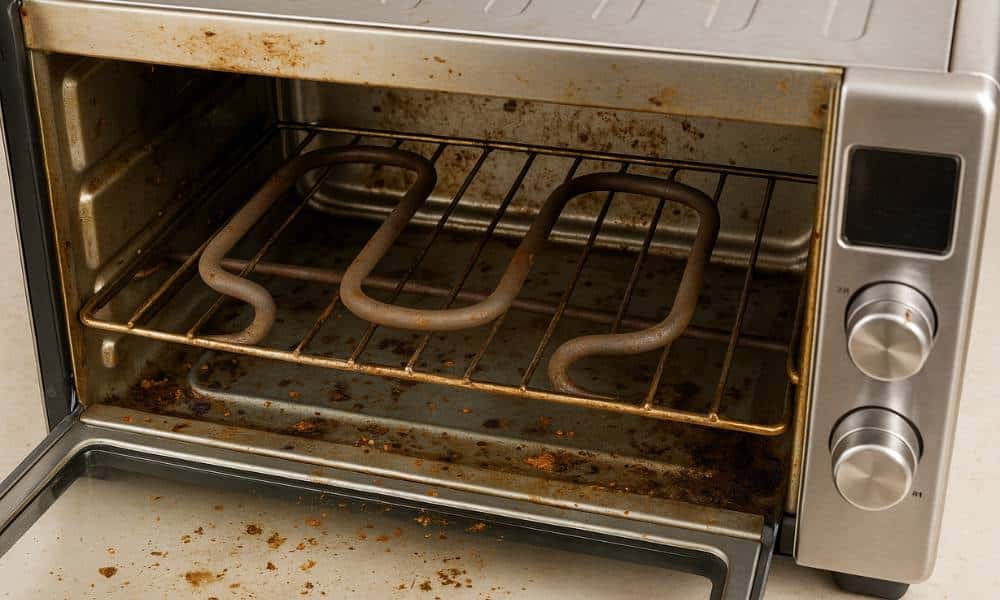
Ever opened your toaster oven and seen the coils covered in brown crumbs or greasy spots? It happens to all of us. I used to ignore it—until the smell of burnt food took over my kitchen. Learning how to clean a toaster oven heating element made my oven heat faster and smell fresh again. My first try with Breville toaster oven cleaning was messy, but I picked up a few smart tricks along the way. In this guide, I’ll show you how to clean toaster oven heating elements safely, remove burn marks, and even fix light rust or baked grease. Let’s make your toaster oven shine again—quick, easy, and stress-free.
Why Cleaning the Toaster Oven Heating Element Matters
Grease and crumbs may look small, but they build up fast. I once ignored them, and the next morning my toast came out smoky and smelled burnt. That was my wake-up call. When you clean a toaster oven heating element, you stop smoke before it starts and help your oven work like new.
A clean oven cooks better. Dirt and grease block heat, so food bakes unevenly. After I cleaned mine, toast turned golden again, not half-burnt. Even leftovers tasted better. Keeping it clean means faster heat, better taste, and less mess later.
It’s also about safety. Grease near the element can smoke or even catch fire. I learned this the hard way when a crumb sparked one day. Luckily, I was close enough to unplug it. Since then, I clean my oven often—it takes five minutes and gives me peace of mind.
Safety First – What You Should Know Before Cleaning
Before you grab that sponge, take a deep breath and unplug your toaster oven. It sounds simple, but many people forget. The heating element stays hot for a while, so always let it cool completely. I usually wait at least half an hour—just to be safe.
Avoid harsh chemicals or rough scrubbers. They can scratch or damage the metal coils. When I first tried cleaning my Breville toaster oven, I made that mistake once and learned quickly that gentle cleaning works best. Stick to mild soap or baking soda paste instead.
Never spray water or cleaner directly onto the heating element. Moisture can seep into hidden parts and cause electrical issues later. Use a damp cloth instead—just enough to wipe, not soak.
And here’s a pro tip: every oven is a little different. Before you start, check your model’s manual for cleaning guidelines. Brands like Breville, Cuisinart, or Hamilton Beach often include safe care steps that make the process easier and safer.
Step-by-Step Guide: How to Clean a Toaster Oven Heating Element
Cleaning your toaster oven doesn’t have to be stressful. Here’s a quick, simple guide on how to clean a toaster oven heating element safely and effectively—just like I do it at home.
Step 1 – Unplug and Let It Cool
Safety comes first. Always unplug your toaster oven before you start cleaning. Even if it looks cool, give it at least 30 minutes after use to let the heating element cool down fully. A warm coil can burn your fingers or cause damage if wiped too soon.
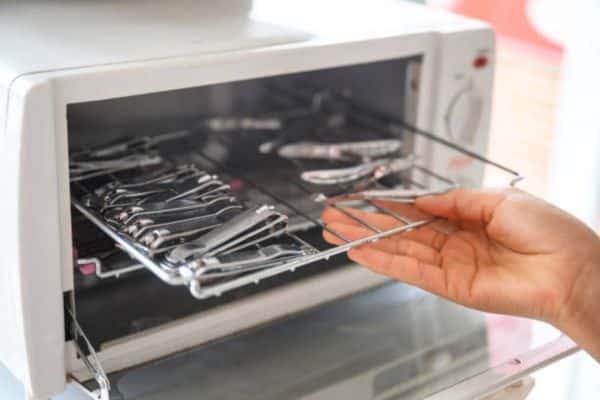
Step 2 – Remove Crumbs and Loose Debris
Take out the crumb tray and shake it over the sink or trash. Then use a soft brush or a small handheld vacuum to remove crumbs stuck near the coils. This simple step prevents smoke and bad odors the next time you cook.
Step 3 – Wipe Gently with a Damp Cloth
Dip a soft cloth in warm water mixed with mild dish soap. Wring it out well—you want it damp, not dripping. Wipe gently around the heating element, but never pour or spray water directly on it. That could cause damage later.
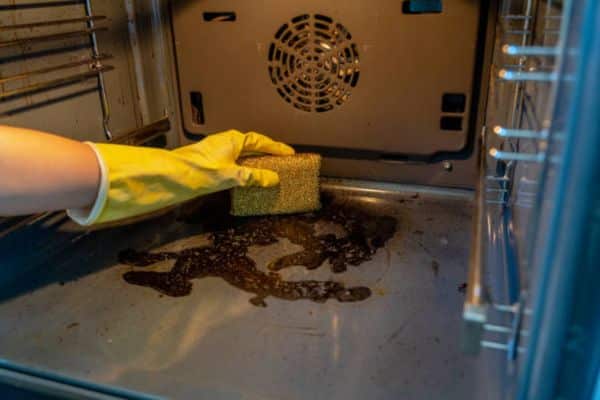
Step 4 – Remove Burn Marks or Stuck Grease (If Any)
If you notice dark spots or stubborn stains, here’s how to clean burn marks off a toaster oven safely. Mix baking soda with a little water to make a paste. Apply it with a soft sponge, let it sit for 10 minutes, then wipe clean with a damp cloth. It’s gentle but powerful enough to lift grease.
Step 5 – Dry Thoroughly Before Plugging In
Once everything looks clean, dry it with a soft towel or let it air dry for at least 20–30 minutes. Moisture and electricity don’t mix, so this last step matters. Only plug it back in when you’re sure it’s completely dry.
How to Clean the Inside and Glass of a Toaster Oven
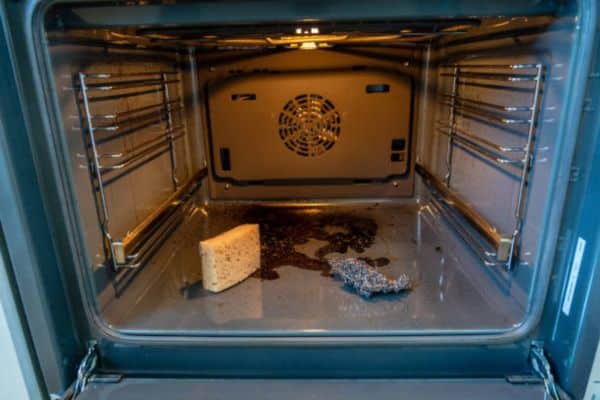
The inside of your toaster oven can get messy fast—splattered cheese, oil drips, and crumbs everywhere. The good news? Cleaning inside a toaster oven is easy when you use the right mix of gentle cleaners and quick habits. I’ve tried many methods, but the simplest one still works best.
Start with a mix of vinegar and baking soda. Sprinkle baking soda over the greasy spots, then lightly spray white vinegar on top. It will bubble a little—that’s the magic working! Let it sit for 10 minutes, then wipe the walls clean with a damp cloth. This removes stains without harsh scrubbing. Just remember to avoid direct contact with the heating elements while cleaning.
Now for the glass door. Fingerprints and splatters make it look dull, but a simple vinegar-water spray and a microfiber cloth bring back the shine. Spray lightly, wipe in circles, and enjoy that clear window again.
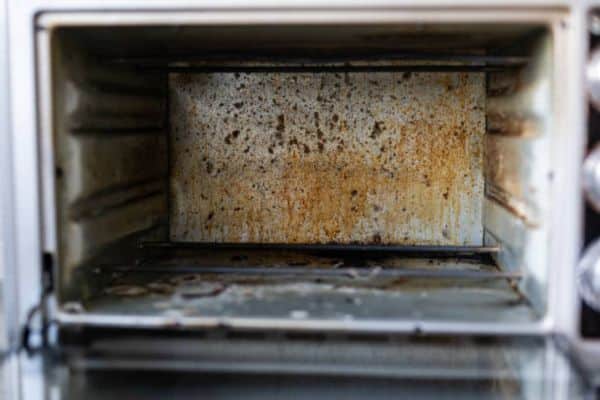
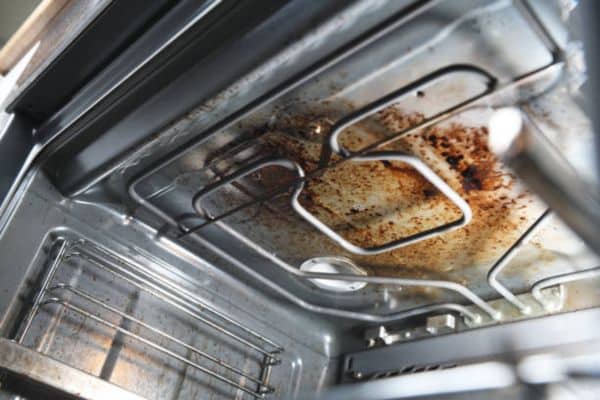
How to Remove Rust from a Toaster Oven (Easy Fix)
Noticed small rust spots inside your toaster oven? Don’t worry—it happens to the best of us. Moisture, steam, or even small food spills can cause those orange stains over time. The good news is, learning how to remove rust from a toaster oven is simple and takes only a few minutes.
Start by making a paste using baking soda and lemon juice. The baking soda lifts the rust while the lemon juice helps dissolve it naturally. Apply the paste to the rusty area and let it sit for about 15 minutes. Then, scrub gently with a soft sponge or toothbrush. You’ll see the rust fade as you clean.
Once it looks good, wipe the area with a damp cloth and dry it completely. Leaving any moisture can cause the rust to come back faster. I like to run the toaster oven empty for five minutes on low heat—just to be sure it’s fully dry.
Best Way to Clean Heating Elements (For Different Brands)
If you’ve ever wondered, “What is the best way to clean heating elements?”, the truth is—it depends a little on your toaster oven brand. But the basics stay the same: gentle touch, mild cleaners, and patience. No matter the model, never scrape, spray directly, or use harsh chemicals.
For cleaning a Breville toaster oven, I’ve found that a damp microfiber cloth and a bit of baking soda paste work wonders. Breville’s stainless-steel coils are sensitive, so avoid rough scrubbing. Wipe gently, rinse with a clean damp cloth, and always dry completely before use.
If you own a Cuisinart or Hamilton Beach, the process is nearly identical. Both brands have exposed heating rods, so unplug first and let everything cool. For heavy grease, dab on baking soda paste, wait ten minutes, then wipe clean.
Oster toaster ovens often have a non-stick interior around the elements. In that case, use only mild dish soap and water—nothing abrasive. A gentle wipe every few uses keeps buildup away.
Pro Tip: Stainless steel coils last longer when cleaned regularly but gently. Think of them like jewelry—shine them softly, and they’ll stay beautiful for years.
How to Get Baked Grease Out of a Toaster Oven
Stubborn grease can turn a clean oven into a smoky mess. If you’re wondering, “How do you get baked grease out of a toaster oven?”, don’t worry—it’s easier than it looks. You don’t need strong chemicals or endless scrubbing. Just a few pantry staples can do the trick.
Start with a simple baking soda paste. Mix three parts baking soda with one part water and spread it over the greasy spots. Let it sit for 15 minutes, then wipe gently with a damp cloth. The paste breaks down grease without scratching the surface, leaving your oven fresh and smooth.
If the buildup is thick, try a white vinegar steam clean. Place a small oven-safe dish filled with equal parts vinegar and water inside your toaster oven. Run it on low heat for about 10 minutes. The steam softens baked grease so you can wipe it off easily afterward.
Here’s my go-to hack: I tried this vinegar steam method last weekend after making cheesy garlic bread, and it saved me from heavy scrubbing. The grease melted off like butter.
My Personal Experience – What Actually Worked for Me
I own a Breville Smart Oven Air Fryer, and trust me, it’s one of my favorite kitchen gadgets—but cleaning it wasn’t always easy. My first few tries were rough. I used a strong store-bought cleaner once, and it left streaks and a strange chemical smell that took days to fade. That’s when I realized gentle, homemade methods worked far better.
Now, I stick to simple DIY cleaning. A baking soda paste for stains, a vinegar-water spray for the glass, and a soft microfiber cloth for the heating element—that’s my magic combo. It takes a little time, but the results are worth it. The oven looks fresh, and food tastes cleaner too.
Compared to store-bought sprays, these natural methods feel safer and more reliable. No harsh fumes, no risk of damaging the coils, and no sticky residue. It’s proof that sometimes the old-school tricks really do beat the fancy products.
Maintenance Tips to Keep Your Toaster Oven Sparkling
Wipe it after every use. A quick pass with a damp cloth stops stains before they set. It takes one minute and saves you from scrubbing later.
Empty the crumb tray once a week. Crumbs burn, smoke, and smell bad. Dump, rinse, dry, and slide it back in.
Use a liner for messy foods. Place a reusable tray liner or foil on the lower rack (never on the element). It catches drips and keeps grease off the walls.
Do a monthly deep clean. Unplug, cool, then clean walls, glass, and the element the gentle way. This keeps heat even and food tasting fresh.
Final Thoughts
Keeping your toaster oven clean isn’t just about looks—it’s about safety and taste. When you unplug first, stay gentle, and clean regularly, you protect both your appliance and your food. It only takes a few minutes but makes a big difference every time you cook.
Think of it like giving your oven a quick spa day. A clean heating element means even heat, no smoke, and food that smells and tastes fresh. It only takes 10 minutes but makes your toaster oven look (and cook) like new.