

I grew up in a home that loved Sunday meals, pots singing on the stove, windows wide, a breeze moving through every room. My aunt set a bowl in the sink, rolled up her sleeves, and cleaned chitterlings with calm hands as stories and laughter filled the house. Years passed and life sped up, yet the craving stayed still, so I chose the slow cooker for ease, steady heat, and deep, soulful taste. Today I will show you how to cook chitterlings in a slow cooker with care, clear steps, simple gear, and a tender bowl that warms the heart.
What chitterlings are and why they shine
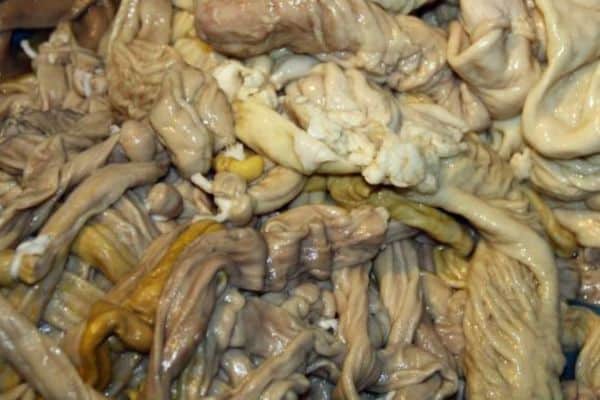
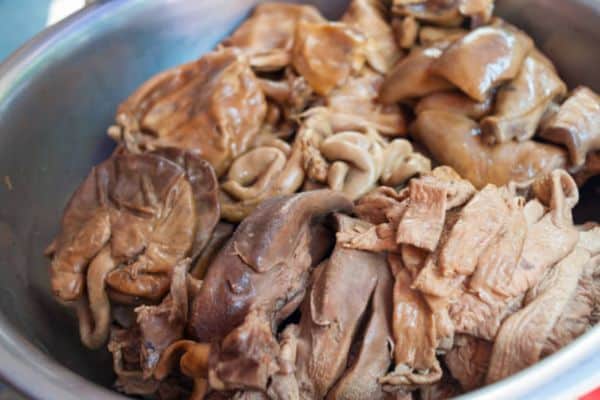
Chitterlings are pork intestines. Folks call them “chitlins” too. They are a classic comfort dish in many homes. The texture turns silky with slow heat. The broth tastes rich and deep. A good bowl brings quiet joy.
Quality and cleaning matter a lot. A gentle process brings out the best. The payoff is tender meat, a lush pot liquor, and a plate that warms the soul.
What you need
Equipment
- Slow cooker with a tight lid, 6–8 quart
- Large colander
- Big bowl or sink basin
- Cutting board and small sharp knife
- Long tongs and a slotted spoon
- Measuring spoons and cups
- Disposable gloves (optional, yet helpful)
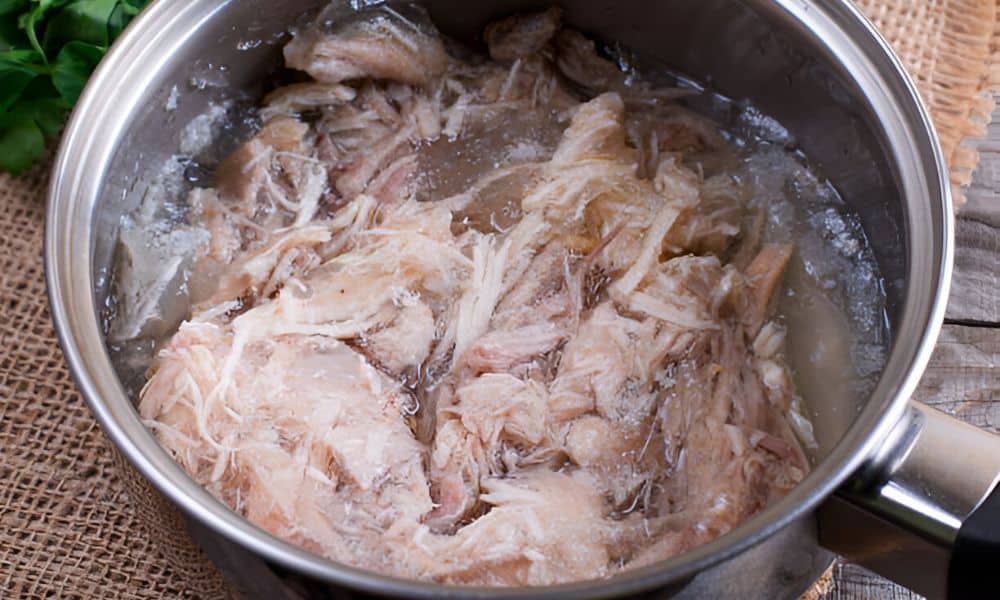
How to prep and clean with care
Great prep leads to great texture and a clean, round taste. Move slow. Keep the water fresh. Stay patient. The bowl will reward you.
- Set up the sink. Place a large bowl or plug the basin. Fill with cold water and a splash of vinegar. This helps with fresh scent and tone.
- Rinse the pack. Open the chitterlings and drop them in the basin. Use gloves if you like. Move the pieces around with your hands. Rinse each piece under running water.
- Trim and clean. Lay a piece on a board. Look for thin fat or bits that do not belong. Use the small knife to peel and trim as needed. Keep the motion gentle. Rinse again.
- Repeat. Keep a steady rhythm. Rinse, trim, and rinse once more. Change the water often. Clear water tells you the job goes well.
- Final bath. Give the bowl a fresh fill of cold water. Add one more small splash of vinegar or lemon. Swirl. Drain through the colander.
- Rest and chill (short). Let the colander sit in the sink for a few minutes. Extra water drips away. This keeps the broth bright, not dull.
Note: A short parboil helps a lot. Boil for ten minutes, drain, and rinse. It tames the scent and helps the slow cooker stay clean. Read Best Slow Cookers for One Person to choose a small model.
Step-by-step: Slow Cooker Chitterlings
These steps keep the process simple. Heat does the work. You enjoy the result.
- Layer the base. Put onion, bell pepper, celery, and garlic in the slow cooker. Add bay leaves.
- Add the meat. Place the chitterlings on top. Tuck them in a gentle stack. Long pieces can be cut into shorter lengths.
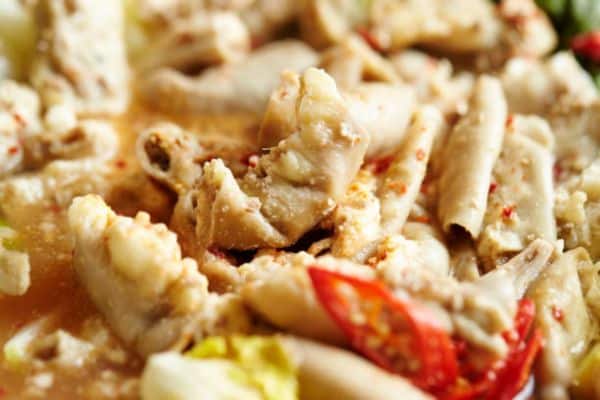
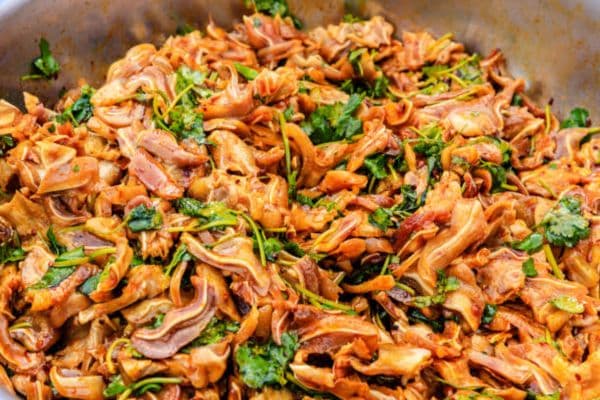
- Season. Sprinkle salt, black pepper, and crushed red pepper. Add paprika, garlic powder, and onion powder if you want more depth. Place the smoked turkey or ham hock in the pot for a classic note.
- Add liquid. Pour in stock or water to cover by about one inch. Add the vinegar or lemon juice.
- Set the heat.
- High: 4–5 hours for tender pieces with a light chew.
- Low: 7–8 hours for very soft pieces and a silkier broth.
- High: 4–5 hours for tender pieces with a light chew.
- Stir now and then. Lift the lid, give a light stir every 60–90 minutes. Use tongs. Keep the lid on tight between stirs so heat stays even.
- Taste and adjust. About one hour before the end, taste the broth. Add a pinch of salt or a bit more acid. Balance is the goal.
- Check tenderness. A fork should slide through a piece with little push. Edges look smooth. The broth looks glossy, not cloudy.
- Finish. Turn off the heat. Remove the bay leaves and the smoked piece, if used. Let the pot rest for 10 minutes. This rest helps flavors settle.
- Serve. Ladle into warm bowls. Spoon extra broth over each serving. Add chopped parsley or green onion on top. A drop of hot sauce tastes great too.
Practical tips from many pots
Start with very cold water. Cold water helps with clean work. It firms the pieces and makes trimming easy.
Trim with a light hand. Remove only what does not look right. Leave enough fat to keep the bite moist and tender.
Change water often during prep. Fresh water is your friend. Clear water means a clean, bright flavor later.
Keep the lid closed. The cooker needs steady heat. Long gaps lead to uneven texture.
Add acid at the start and near the end. A small splash early lifts the broth. A small splash late sharpens the finish. Think balance, not sting.
Salt with care. Start light. Stock and smoked meat add salt too. Taste near the end and add a pinch as needed.
Use a smoked piece for depth. A turkey wing or ham hock adds warmth and body. The broth turns round and rich.
Work in clear zones. Keep raw prep on one side of the sink. Keep clean tools on the other side. This keeps your space safe and neat.
Vent the house a bit. Crack a window. Turn on the vent hood. The scent is part of the charm, yet a little airflow keeps the air fresh.
Rest the pot. A short rest after cooking brings calm to the broth. The taste turns smooth and full.
Texture guide
For a bit of chew: Use the High setting for about 4 hours. Test with a fork. Add 30 minutes more as needed.
For very soft bites: Use the Low setting for 7–8 hours. The pieces turn silky and tender.
For a spoon-soft bowl: Cook on Low to the full range and let the pot rest a bit longer. The broth thickens slightly. Each bite melts.
Troubleshooting made easy
Too tough? Add 30–60 minutes more on High. Make sure the pieces stay covered with liquid. A small splash of stock can help.
Too soft? Pull the pot early next time. Cut the pieces a little thicker. Use less acid at the start and add more at the end.
Broth tastes dull? Salt may be low. Add a small pinch. A squeeze of lemon can wake it up.
Strong scent in the pot? A quick parboil before the slow cook can tame that. A bay leaf and a splash of vinegar help too. Good airflow in the kitchen makes a big difference.
Greasy surface? Skim with a spoon. A few ice cubes wrapped in paper towels can draw up fat fast. Glide the bundle across the top. Lift and discard.
Serving ideas that sing
Cornbread on the side. Warm, crumbly, and perfect for dipping. The broth soaks into each bite. Joy in a bowl.
Steamed rice. Spoon chitterlings and broth over soft rice. The texture match feels just right. Add sliced green onion on top.
Braised greens. Collards, mustard greens, or turnip greens pair well. The bitter edge plays nice with the rich broth.
Hot sauce bar. Set out a few styles. A mild vinegar style and a smoky style cover most tastes. Guests pick their own path.
Pickles and slaw. A crisp bite cuts through the lush broth. The plate feels balanced and bright.
Storing and reheating
Cool and store. Let the pot cool to warm, not hot. Spoon into shallow containers. Cover and place in the fridge for up to four days.
Freeze for later. Pack in freezer-safe containers with broth. Label and date. Enjoy within two to three months.
Reheat to steaming. Warm on the stove over medium heat. Stir often. A splash of fresh stock brings the broth back to life. In the microwave, heat in short bursts and stir between bursts.
Conclusion
A calm sink, clean prep, and slow heat made this dish shine. The steps stayed clear, the broth stayed bright, and the meat turned tender. This is how to cook chitterlings in a slow cooker with care and ease. The result tastes warm, deep, and true.
Set the table and share a bowl. Add greens or rice and a splash of hot sauce. Take a breath and enjoy the quiet joy of a well-made pot. Your kitchen now holds a new, trusted path to comfort.