

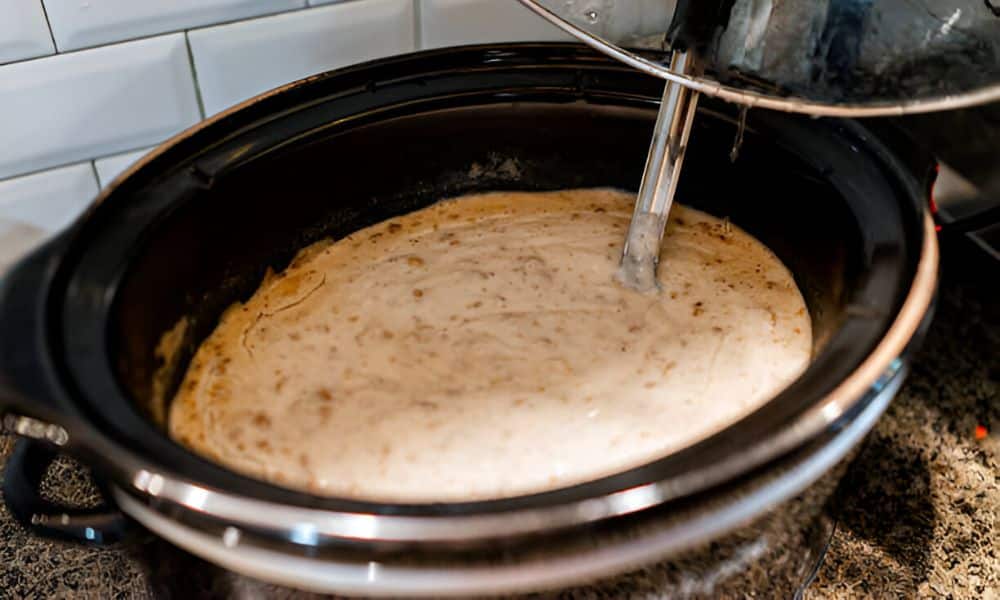
I never planned to make yoghurt at home. One day, with only milk and a slow cooker on hand, I gave it a try. I poured the milk, added a spoonful of plain yogurt, and left it overnight. By morning, I had a creamy bowl of fresh, homemade yoghurt. That one simple batch changed how I see food. It was easy. It was pure, Tasted better than anything from the store. Learning How To Make Yogurt In A Slow Cooker became a habit I enjoy each week. In this article, I’ll show you how to do it—step by step.
Why Make Yogurt at Home?
Most store yoghurts have things you don’t need. Extra sugar. Artificial flavours. Preservatives. At home, you skip all that. You use real milk and real yoghurt. That’s it.
Your body feels the difference. Homemade yoghurt is clean, fresh, and full of good bacteria. You taste the change in every spoonful.
It costs less, too. One gallon of milk makes a big batch. That batch lasts longer and saves you money.
You also get control, Decide the flavour And choose the thickness. You adjust the tang. No surprises—just what you like.
It’s a great skill for beginners. No cooking degree needed. Just a slow cooker and some time. Even the best slow cookers for one person work great for this.
What You Need to Make Yogurt in a Slow Cooker
You don’t need much to get started. That’s the beauty of it. Most kitchens already have what’s needed.
Start with two simple ingredients:
- Milk (whole milk works best)
- Plain yogurt with live cultures (just a spoon or two)
That’s it. No powders. No fancy mix-ins. Just real food.
Now for the tools.
You’ll need:
- A clean spoon
- A thick towel or small blanket
Step-by-Step Guide
Making is simple once you know the steps. This guide shows you exactly how to make —no stress, no guesswork. Just take your time and enjoy the process.
Step 1: Warm the Milk
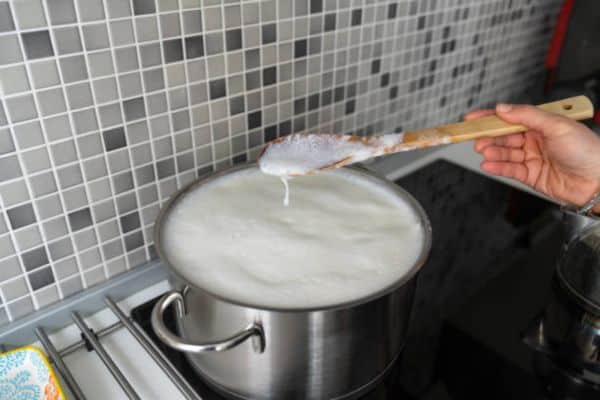
Pour milk into your slow cooker. Use enough to fill it two-thirds full. Set the heat to low. Let it warm for about two and a half hours. The goal is to reach 180°F. You can check with a thermometer, or touch the side—it should feel hot, not boiling.
Step 2: Cool It Down
Turn the cooker off. Let the milk sit with the lid off. Wait about one hour. It should cool to around 110°F. That’s the cozy spot for culture to grow. You want it warm, not hot.
Step 3: Add the Yogurt Starter
Scoop 2–3 tablespoons of plain into a small bowl. Add a bit of warm milk. Stir until smooth. Pour it back into the slow cooker. Stir again, gently, to mix it through.
Step 4: Wrap and Let It Rest
Put the lid back on. Wrap the cooker with a thick towel or small blanket. This holds the heat inside. Let it sit on the counter, undisturbed, for 8 to 12 hours. Longer rest = tangier yogurt. I like to leave mine overnight.
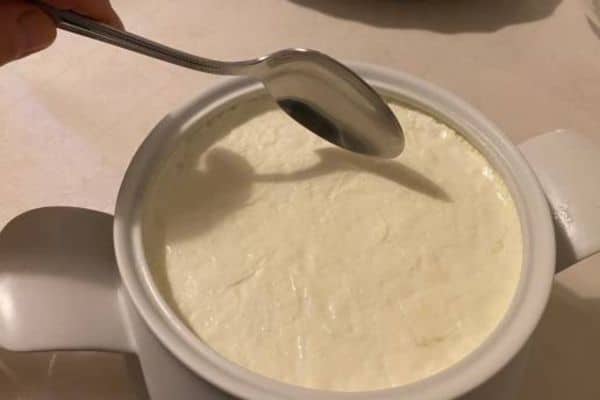
Step 5: Chill and Enjoy
Unwrap the cooker and check the texture. It should look thick and smooth. You may see a little liquid on top—that’s normal. Spoon into clean containers. Chill in the fridge for 2 to 3 hours. Then taste it. Creamy. Tangy. Yours.
Pro Tips for Perfect Yogurt Every Time
Want thick, creamy every time? These small tips make a big difference. I’ve learned them by testing, tasting, and yes—messing up more than once.
Use Whole Milk
For rich texture, always use whole milk. It gives that soft, spoon-coating feel. Low-fat milk works too, but the result is thinner. The extra fat makes it smooth and satisfying.
Don’t Peek or Stir
Let the rest without lifting the lid. No poking. No stirring. Each time you check, you let heat escape. That slows the process and can weaken the set. Let it rest in peace.
Save a Bit for Later
Before you eat it all, save a few spoons in a clean jar. That becomes your next starter. Fresh yoghurt makes better yogurt. After two or three batches, start with a new store-bought one to refresh the cultures.
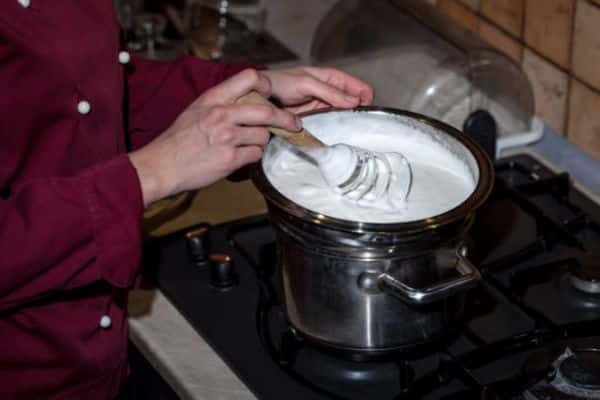
Want Greek Yoghurt? Just Strain It
Line a bowl with cheesecloth or a clean cotton towel. Pour in and let it drain for one to two hours. The longer it sits, the thicker it gets. What’s left behind is Greek-style—thick, creamy, and rich.
How to Store and Use Homemade Yogurt
Pick the Right Containers
Store it in clean, food-safe containers. Glass jars with tight lids work best. They keep the flavor fresh and the texture smooth. BPA-free plastic containers are also fine if that’s what you have.
How Long It Lasts
Homemade yogurt stays fresh in the fridge for 7 to 10 days. Keep it sealed and cold. Use clean spoons each time to help it last longer. You’ll notice a light tang as it ages—that’s normal.
Ways to Enjoy It
Yogurt goes with almost anything. Add berries and honey for breakfast. Blend it into smoothies for a creamy boost. Or use it as a base for dips and sauces. I even spread it on toast with a sprinkle of salt.
Make the Most of Each Batch
Store in small jars so you can grab one and go. Mix in fruit or spices just before serving. This keeps the flavor fresh. It also lets each person enjoy their way.
Troubleshooting Common Yogurt Problems
Even simple recipes need a little help now and then. Don’t worry—these fixes are quick and easy.
Yogurt Too Runny? Try This
Thin yoghurt often means low heat or not enough resting time. Make sure the milk reached 180°F before cooling. Also, let it rest at least 8 hours without moving it. For thicker results, strain it for an hour using a cloth or fine mesh.
No Tangy Taste? Here’s What Happened
The tang comes from live cultures. If tastes bland, the milk may have cooled too much before adding the starter. Next time, check that the milk is warm—not cold—before mixing. Also, give it a full overnight rest to build flavour.
Forgot to Save Starter? Easy Fix
It happens. Just buy a small cup of plain yoghurt with live cultures from the store. Use that to start your next batch. After that, you’re back on track. Keep a small jar labelled in the fridge next time.
Mistakes happen, but they’re part of learning. Each batch teaches you more. And once you get it right, it becomes second nature.
Final Thoughts
Making yogurt at home sounds hard. But it’s not. It’s a small habit that brings big joy. You just need milk, a spoon of yogurt, and a little patience.
This is a skill anyone can learn. Your first batch might be runny. Your second might be perfect. That’s the fun of it—you grow with each try.
So go ahead. Make it once. Then try it again. Add your twist. Make it thicker. Try new toppings. Turn it into a snack you look forward to.
FAQs
Can you really make yogurt in a slow cooker?
Yes, you can. A slow cooker keeps the milk warm for hours. That steady heat helps set well. It’s one of the simplest ways to make at home.
How long does it take to make yogurt this way?
The process takes about 10 to 12 hours. That includes heating, cooling, resting, and chilling. Most of that time, the cooker does the work. You wait, then enjoy.
What’s the best milk to use?
Whole milk gives thick and creamy results. It holds its shape and tastes rich. You can use low-fat milk, but will be lighter. Use plain milk with no extras.