

A clean coffee grinder is Essential for making the perfect cup of coffee. Over time, espresso grinders can accumulate coffee grounds, Oils, And residue. Which can negatively affect the taste of your brew. Grind your espresso beans evenly by learning How to properly clean your coffee grinder. And will ensure your grinder works efficiently. In this comprehensive guide, We’ll outline the steps And techniques needed to maintain your espresso grinder for optimal performance. Giving you the best espresso experience possible. Whether you are A professional barista or A espresso enthusiast At home. Following these cleaning procedures will Help you enjoy the freshest And tastiest espresso.
1. Unplug The Coffee Grinder First
Unplugging the coffee grinder before cleaning is An important step that should not be overlooked. Like other kitchen appliances, caffeine windmill Also require regular cleaning. So that they work optimally And produce fresh tasting espresso every time. Cleaning your caffeine windmill can seem difficult. But with the right tools And techniques, It can Be done quickly And easily.
Before starting the cleaning process, You need to collect all the necessary materials. These include A soft-bristled brush or toothbrush, Dry cloth or paper towels, And dishwashing detergent. And warm water. You Also need to make sure that there are no beans left in the grinder as it is the windmill during cleaning. And your equipment can damage both. Once you Have all this ready, To prevent electric shock during cleaning. Unplug your espresso grinder From its power source.
2. Disassemble The Grinder Parts Carefully
Cleaning your coffee grinder is An essential task that should Be done regularly to ensure the freshness And quality of your coffee. Carefully disassembling the parts of the grinder is an Important step in this process. This article Will guide you through the steps needed to clean your caffeine windmill. It will focus on disassembling properly.
The First step in disassembling A caffeine windmill is to unplug it from its power source. Once this is achieved, Remove Any excess beans or grinds from the hopper. And then proceed to remove the removable parts like hopper, Burrs And ground bin. It is important to note that different windmill may have different parts. Which can Be removed for cleaning purposes. After removing all removable parts, Use A brush or cloth to thoroughly clean each piece. Do not use water unless specified by the manufacturer. Because doing so may damage some components of the machine.
3. Remove Any Remaining Coffee Beans
Cleaning your coffee grinder is An essential part of maintaining the quality And taste of your coffee. One of the challenges of cleaning A caffeine windmill is removing Any leftover espresso beans stuck inside. If these beans are not removed, They can cause problems with the grind in the future, So it is important to know How to clean them properly.
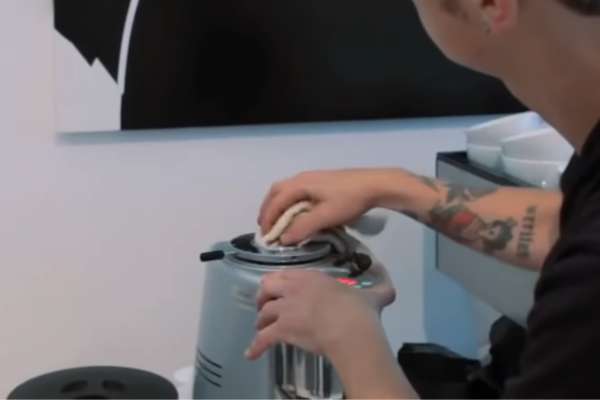
First, Unplug your grinder And remove the hopper or Bean container from the top of the machine. Look inside to see if there Are any visible beans left. If you find any, Use A small brush or toothbrush. Gently sweep them into the trash can or compost bin. Make sure not to use anything metallic as it can damage your machine. Next, Tilt the grinder on its side so you can access the burrs (the metal plates that grind the beans).
4. Use A Brush To Clean Debris
When it comes to cleaning coffee grinders, There are A few things you need to keep in mind. First And foremost, It’s Important to clean your windmill regularly to ensure the Best possible flavor from your fresh beans. An easy way to clean your coffee grinder is to use A brush.
To begin, Unplug your caffeine windmill And remove Any remaining beans from the hopper. Next, Open the burrs or blades depending on your model. And use A small brush to remove Any remaining debris or grounds. Be sure not to use anything too abrasive that could damage the burrs or blades. In addition to brushing Any debris off the burrs, You other parts of your grinder. For example, Brushes can be used to clean hoppers And chutes. Just make sure everything is completely dry before reassembling your machine And plugging it back in.
5. Wipe The Interior With Cloth
Cleaning your coffee grinder is essential to ensure the Best possible cup of espresso. One area that is often overlooked, however, Is the interior of the windmill. Wiping the interior with A cloth can cause build-up over time. That can Help remove Any remaining grinds And oils.
To begin cleaning the interior of your caffeine windmill, Unplug it from its power source. And remove Any remaining beans from the hopper Once empty, use A dry cloth to wipe All visible surfaces of the interior. Be sure to pay special attention to areas where dirt can accumulate, Such As burrs or around the blade. If you notice any stubborn stains or buildup inside your grinder. But try using A damp cloth instead of A dry cloth. You can Aso add A small amount of mild dish soap to hot water for extra cleaning power.
6. Wash The Removable Parts Thoroughly
Maintaining your coffee grinder is important to Ensure it produces high quality ground coffee. When cleaning A caffeine windmill is Most important. One of the steps is to thoroughly wash the removable parts. These parts can contain dirt and bacteria, Which can affect the quality of yourespresso.
Before you start cleaning, Be sure to unplug the windmill from its power source. After that, remove all removable parts like hopper, Burrs And ground bin. Wash these parts in warm soapy water. And scrub gently with A soft-bristled brush to remove Any stubborn stains or dirt. All soap residue is removed before drying with A clean cloth or Allowing to air dry. Rinse each part under running water to make sure.
7. Use Mild Soap And Water Only
Keep your coffee grinder clean to keep it working properly. And essential to ensure that high quality coffee is produced. However, Many people do not harm them or affect the taste of their espresso. Struggled with How to clean their caffeine windmill. The good news is that to keep your windmill in tip-top shape. You don’t need Any special equipment or expensive cleaning solutions.
The first thing to remember is when cleaning your coffee grinder. That you should only use mild soap And water. Harsh detergents or abrasive cleaners can damage the delicate parts of your windmill. and can affect the taste of your espresso. Instead, Mix A small amount of dish soap with warm water. And use A soft cloth or sponge to gently clean the outside of your grinder. Be sure to rinse thoroughly with clean water And dry completely before using again. When it comes to cleaning the inside of your caffeine windmill, There Are several methods you can try.
8. Dry The Parts Completely Before Reassembling
Cleaning your coffee grinder can seem like A daunting task. But keeping it clean is important for optimal performance. Cleaning your caffeine windmill is one of the Most important steps. Allow the parts to dry completely Before reassembling. This ensures that no moisture or water droplets cause rust or damage to the internal components of the grinder.
To begin, Disassemble the caffeine windmill And remove all removable parts. Be sure to read the manufacturer’s instructions for proper removal And cleaning of each part. Next, Remove any loose debris or grounds from inside the windmill. Use a dry cloth or brush. Then, Wash each removable part thoroughly with Warm soapy water And rinse with clean water. After washing, Place all parts on A dry towel And allow them to dry completely. It is recommended to wait At least 24 hours Before reassembling the grinder to ensure All parts are completely dry.
9. Use A Dry Cloth To Wipe Exterior
Cleaning your coffee grinder is essential to ensure it produces great tasting, freshly ground coffee. In addition to regularly cleaning the inside of your grinder, it’s Also important to clean the outside. An Easy way to do this is to use A dry cloth.
To begin, unplug your caffeine windmill and remove any remaining beans from the hopper. After that, take a dry cloth and gently wipe the outside of the machine. Be sure to pay attention to any crevices or hard-to-reach areas. Where dust and grime can accumulate over time. Using a dry cloth avoids water damage that may occur. If you use a damp cloth or even water itself. Cleaning with water can damage the sensitive electrical components inside your espresso grinder. As well as leaving unsightly water stains on its outer surface.
10. Avoid Using Harsh Chemicals or Solvents
Keeping your coffee grinder clean is important to maintain performance and longevity. However, It is equally important to avoid using harsh chemicals or solvents when cleaning. These substances can damage the internal components of the grinder. And can negatively affect the taste of your coffee.
Instead, Opt for gentler cleaning methods such as using a soft brush or cloth to remove any residue. You can also use rice grains or bread crusts to absorb any oil from the espresso beans. Another effective method is to mix baking soda with water. And using this solution to clean the blades and interior of the grinder. By avoiding harsh chemicals or solvents And opting for A gentle cleaning method, You’ll ensure. That your caffeine windmill is both clean And working optimally. Not only will this enhance the taste of your morning brew, It will also prolong the life of your beloved machine.
11. Clean The Burrs With Toothbrush
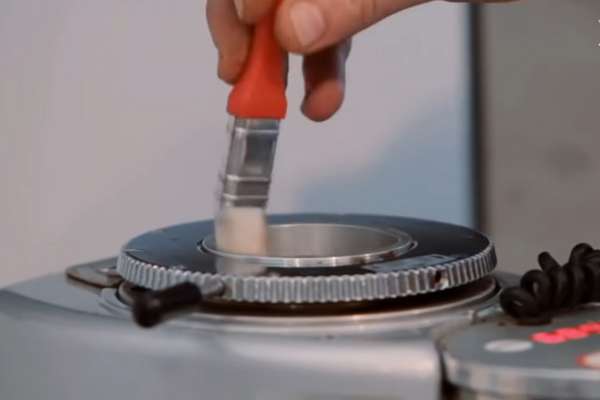
Keeping A clean coffee grinder is essential to ensure A great-tasting And consistent brew. Despite its importance, Many people neglect to clean their grinders regularly. One of the Most common problems coffee lovers encounter with their grinders are burrs that get clogged with espresso residue. which can affect the taste of your coffee. Luckily, Cleaning your grinder’s burrs couldn’t be easier – all you need is a toothbrush!
To start cleaning your burrs, Unplug your grinder And remove the hopper from the top. Next, Gently tap into the trash bin or paper towel. After you Have removed As much debris as possible, Take your toothbrush. And gently brush the burrs in small circular motions to remove remaining particles. Be sure to pay extra attention to the spaces between each tooth on both sides of each bur.
12. Remove Any Stuck Particles Gently
Cleaning your coffee grinder is An essential step to ensure you get the best tasting coffee every time. However, It can be difficult to remove All the stuck particles without damaging your grinder. The good news is that gently removing Any stuck particles is easier than you think.
First, Unplug your caffeine windmill And remove Any removable parts such as the hopper, burrs or blades. Use A soft-bristled brush to clean any loose espresso grounds, Dust or debris in these areas. Be sure to do this with A sink or towel so you don’t make A mess. Next, Grime or oil can build up on the outside of the grinder And over time. Use A microfiber cloth to gently wipe any other spots. For stubborn stains, You can soak the cloth in hot soapy water But be careful not to get the water inside the machine.
Conclusions
Keeping your coffee grinder clean is important to ensure the best taste And quality of your coffee. For general cleaning, Use A damp cloth And mild soap. For tougher messes, Use A cleaner made specifically for espresso equipment. Be sure to dry the grinder completely before using it again. Finally, Be sure to store your windmill properly so it lasts for years.